|
Fashion & Costume Design in Quarter Scale
by Don McCunn Print and Cut EquipmentPrint and cut technology makes it possible to quickly create Mini-Mes out of poster board and fitting shells out of fabric. The only manual processes required after the poster board and fabric are cut is to tape the poster board into three-dimensional Mini-Mes and sew the fabric to create fitting shells. The CAD files on this website include labels and alignment notches that can be printed on the Mini-Mes and sewing notches and dart lines that can be printed on the fabric prior to the material being cut. The precision of the cutting process is extremely precise, even better than cutting the material by hand. While a few print and cut systems are currently available, the technlogy selected for the quarter scale work described here comes from Silhouette America. That is because their equipment will cut both poster board and fabric and their Studio software that controls the equipment, while not a CAD program, has all the necessary functions to create original designs from fitting shells using a Computer-Aided Pattern Design cycle (CAPD). The cost of the entry level equipment is less than most sewing machines and the basic Studio software is free. The Cameo Pro equipment described below has a 24" by 24" cutting mat that can be used to scale the patterns from the book by 400% and cut full-size fitting shells as well as other types of garments. ContentsStudio SoftwareTo use this technology you need to load the Studio software into a PC (Windows 10 - Windows 11) OR Mac (MacOS 11 and higher) computer. It cannot be used with chromebooks, tablets, or mobile devices. The computer needs to be connected to the print and cut equipment using either a USB cable or Bluetooth connection the same way you connect any desktop printer. The basic Studio software is free. The patterns for Mini-Mes and Master Patterns included in Fashion & Costume Design in Quarter Scale are free and ready-to-use. If the Studio software is going to be used to create files that can be exported to CAD programs, only the Business Edition which is not free will convert the files to the SVG format. For CAD software that does not import the SVG format, the free Inkscape Software can be used to convert SVG files to DXF files. The card from Amazon for the Business Edition comes with a code. To use the code, follow these steps.
The EquipmentSilhouette offers the 7 different print and cut machines. The most importance differences between the models for CAPD is the size of the cutting mat and the cutting depth. All the Studio files for the patterns from the book are sized for the smallest Portrait 3 model. The Cameo 4 Plus is the obvious choice for anyone wanting to scale patterns up to create full-size garments. The list price is an indication of what the various models will cost but both Amazon and the company may offer any of them at a discount.
AccessoriesWhen you are using this technology, you place the material to be printed and cut on an adhesive cutting mat. This is then inserted into the equipment. To print, insert a pen into the equipment--to cut, insert a blade. After the material is processed, it needs to be removed from the adhesive cutting mat. Fabric needs to be stabilized prior to being placed on the adhesive cutting mat Fabric StabilizerTo print and cut fabric with this equipment it needs to be stabilized. There are various products that can do this that will stiffen the fabric and then be removed after the fabric is cut. In my initial research I tried the stabilizer sheets from Shilouette America and found it unsatisfactory. It was awkward to use and left a residue on the fabric that was thick and difficult to remove. Fortunately I was introduced to Terial Magic Fabric Spray. This product works like a starch. You spray it on the fabric, hang it up so it can soak into the fabric, then iron it dry. It changes the fabric to a paper like consistency. Using this product I found I was able to cut the fabric using a regular desktop paper cutter. Something I would never try to do with fabric that had not be stabilized. It also worked better for printing. It my initial attempt with the product from Shilouette America I found the pen snagged on the fabric and left very faint lines. This did not occur using Terial Magic Fabric Spray. Cutting MatsA cutting mat comes with the purchase of the initial equipment. With use, this mat will need to be replaced. It can also be handy to have several mats on hand. Each model of the equipment uses a mat that is appropriate to the size of the equipment. There are also mats with different degrees of adhesion.
* From Silhouette America
To prolong their useful life, mats should be cleaned after they have been used and kept covered when not in use.
* These were recommended online by a user. I have not personally verified they work.
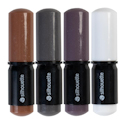
PensThe equipment is shipped with a cutting mat and blade. Pens need to be ordered separately. Pens are available in black and white and a variety of colors. The colors can be handy when drawing the sewing nocthes and dart lines on fabric. The pen holder can be used to hold pens such as a Marks-B-Gone. It accomodates small, medium, and large sizes. The pens need to be straight up and down like a pencil. For example, a Sharpie will not fit into the pen holder due to the shape of its body.
* From Silhouette America
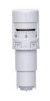
BladesThere are three types of blades for the Silhouette equipment.
As with scissors cutting blades for fabric should be kept separate from cutting blades for poster board.
* This is only for the Cameo 4 print and cut equipment
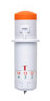
ToolsThe equipment is shipped with a cutting mat and blade. Tools need to be ordered separately. Here is a tool kit that is worth acquiring.
The tool kit also includes a Pick-Me-Up® tool which I am not sure how it would be used for the Mini-Mes. But the other day I was putting some vinyl letters on my quarter-scale store front to spell out "Fashion and Costume Design." If I had been aware of how to use this tool, it would have been a huge help. Here is the description I didn't know about. "The Pick-Me-Up® tool has a tacky tip for picking up and placing small objects. The tool tip can be twisted to expose further sticky tack material as it begins to wear down. It also has a removable stylus on the back of the tool so that you can press small pieces into place to help release them from the tool's tacky grip." Copyright © 2023 by Don McCunn |